Bonevia Bonevia

How to Choose Orthognathic Surgery Implants?

Time:2026-10-31 Author:Isabella
0%

Choosing Orthognathic Surgery Implants is not simply a matter of selecting a material or plate. The right choice supports the planned jaw correction, stable healing, and the patient’s individual anatomy. Orthognathic surgeon Dr. Larry Wolford is a recognized specialist in this field. A useful guiding paraphrase of a patient-specific approach—not a verbatim quotation—is: “Choose fixation to support the correction, not to dictate it.”

Small details matter. The surgeon considers the osteotomy, bone thickness, bite, planned movements, and whether the plates and screws can sit securely. Titanium fixation is commonly used because it is strong and dependable; resorbable options may suit selected cases. Neither choice is automatically best. Imaging, medical history, healing risks, and the possibility of later hardware removal can all influence the discussion.

There is no universal implant set. The orthodontist and oral and maxillofacial surgeon should coordinate the plan, then explain why a particular system fits the patient’s needs. Ask what material is proposed, where it will be placed, and what follow-up may involve. Clear answers build trust.

And pause when something feels unclear. A technically sound plan can still leave patients uncertain if its trade-offs are not explained. This guide explores the practical factors behind implant selection, the questions worth asking, and the limits of what any implant choice can promise.
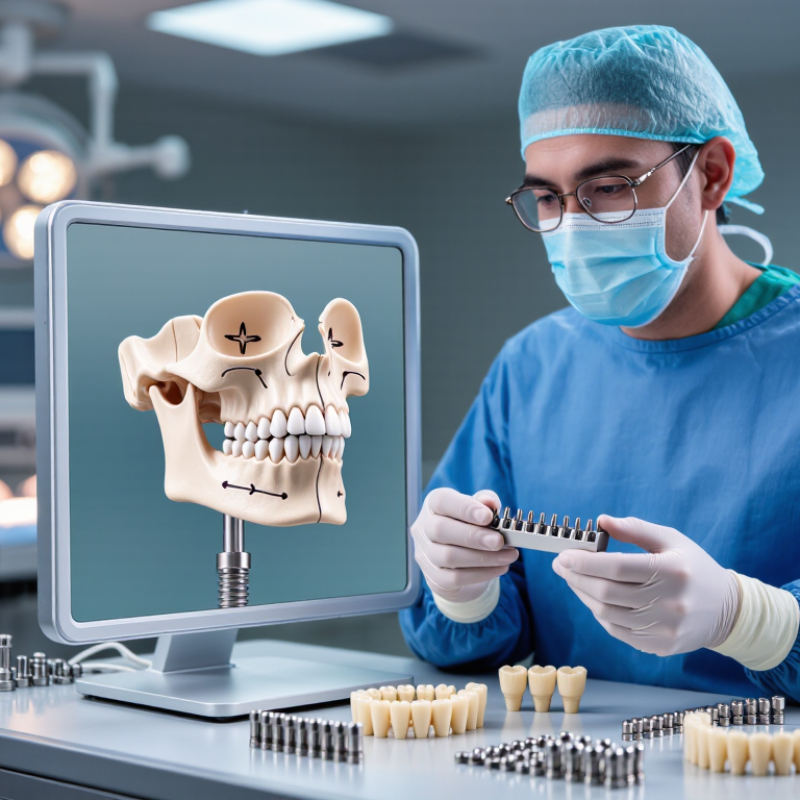
How to Choose Orthognathic Surgery Implants?

Define the Implant’s Role: 2.0-mm Systems Commonly Fix Jaw Osteotomies

How to Choose Orthognathic Surgery Implants?

Define the Implant’s Role: 2.0-mm Systems Commonly Fix Jaw Osteotomies

In orthognathic surgery, a 2.0-mm system commonly refers to the screw-size category used with plates to stabilize repositioned jaw segments. It is fixation hardware, not a replacement for careful surgical planning or good bone contact. The aim is to maintain stability while the bone heals and the bite adjusts. That distinction matters.

A surgeon selects plate shape, screw length, and placement based on the jaw region, bone thickness, and planned movement. A plate near the upper jaw may sit close to tooth roots or the nasal floor. Imaging and anatomical assessment help guide placement. In the lower jaw, muscle forces and the direction of movement can affect how stress reaches the fixation. More hardware is not automatically better.

The “2.0 mm” label alone cannot determine whether a setup fits a particular patient. Bone quality, segment position, and stability all matter; some cases may need additional fixation. Details vary. Plates can sometimes be felt under thin soft tissue, and removal may be discussed if persistent symptoms develop. The trade-off is not always neat. The treating surgical team makes the choice after reviewing scans, examination findings, and the individual movement plan.

How to Choose Orthognathic Surgery Implants?

Define the implant’s role: fixation systems stabilize bone segments after osteotomy. A 2.0-mm system is commonly used for jaw fixation, but the appropriate system depends on the procedure and clinical judgment.

The values show nominal screw diameter, not plate thickness. Both 1.5-mm and 2.0-mm systems are used in maxillofacial fixation; these figures are system dimensions, not a recommendation for a particular patient.

Compare Materials: ASTM F136 Specifies Ti-6Al-4V ELI for Implants

When comparing implant materials for orthognathic fixation, look beyond the alloy name. ASTM International’s F136 specification covers wrought Ti-6Al-4V ELI for surgical implant applications. ELI means extra-low interstitials, including tightly limited oxygen. The standard gives minimum tensile strength of 860 MPa and yield strength of 795 MPa for specified product forms. It also sets a minimum elongation of 10%. These are material-test values, not guarantees of clinical performance. A useful distinction.

Compared with commercially pure titanium, Ti-6Al-4V ELI provides higher strength, which can help designers make compact plates and screws for contoured facial bones. But strength alone does not select the right implant. Bone quality, screw position, plate geometry, and chewing forces matter too.

One uncomfortable point: stronger alloy does not automatically mean better healing.

Surgical teams should verify that the finished device—not only its raw stock—is documented to applicable ASTM F136 requirements. Ask for material traceability and evidence addressing fatigue, corrosion, and surface finish. These details can be overlooked when attention stays on a single strength number.

Match Plate Design and Screw Length to Bone, Load, and Osteotomy

Choosing orthognathic fixation starts with the osteotomy, not the implant catalog. Bone thickness, segment shape, and access determine which plate design can sit securely without forcing the segments out of position. A narrow or irregular surface may favor a low-profile plate that can be contoured carefully. Fit matters.

Bite forces, muscle pull, and movement at the osteotomy influence the fixation needed. Areas exposed to greater bending may require a stiffer plate or additional fixation points, according to the surgical plan. Screw length should match the measured bone thickness and planned trajectory. Longer is not always stronger. On imaging, the team can map nearby tooth roots, the inferior alveolar canal, and the maxillary sinus. A screw that projects too far may threaten these structures; one with too little bone engagement may provide inadequate purchase.

The osteotomy also changes what “good fit” means: segments must align as planned while the plate rests on bone. Measurements are useful, but they are estimates, and anatomy can be less tidy than a scan suggests. That uncertainty deserves attention. Intraoperative checks of plate seating, screw engagement, and segment stability help guide adjustments. The choice should reflect the patient’s anatomy and the surgeon’s assessment, rather than a single preferred plate or screw length.

Evaluate Patient-Specific Implants Using CT-Based Surgical Planning

Choosing an orthognathic implant starts with the patient’s anatomy, not a standard shape. CT images let the surgical team examine bone thickness, asymmetry, tooth roots, and nearby nerves in three dimensions. A digital model can show where bone may need support and whether an implant could interfere with planned jaw movement. Small details matter. A few millimeters can affect fit, fixation, or access during surgery.

The plan should be reviewed alongside the patient’s bite, facial goals, medical history, and clinical examination. Image segmentation is not always exact; metal artifacts or movement can obscure important edges. The surgeon and design team should check the model against the original scans and confirm that the proposed implant leaves safe space for screws and sensitive structures. They should also discuss alternatives, risks, and how the implant may affect future imaging or revision surgery. CT planning adds useful detail, but it cannot predict every healing response. That limitation deserves an honest conversation. Sometimes the clearest plan still needs adjustment in the operating room.

Check Regulatory Clearance, Sterility, and MRI Labeling Before Selection

Before choosing an orthognathic implant, verify its exact model and intended use in the relevant regulator’s database. A clearance record supports lawful marketing for a stated use; it does not prove that one implant performs better than another. Match the model number, material, and size to the surgical plan, and check the UDI and lot details on the package. WHO’s Global Guidelines for the Prevention of Surgical Site Infection report SSI incidence ranging from 1.2% to 5.2% in high-income settings and 11.8% in low- and middle-income settings. These figures cover varied surgeries, not jaw implants specifically, but they underline why sterile handling matters.

Inspect the sterile barrier for tears, moisture, or a broken seal, and confirm the expiry date and sterilization method in the instructions. ISO 11135 and ISO 11137 describe validation frameworks for ethylene oxide and radiation sterilization; the device documentation should identify the applicable process. Keep the lot record. Small detail. Important later.

MRI labeling needs the same attention. ASTM F2503 defines terms such as MR Safe and MR Conditional, but “conditional” only applies under stated scanning limits. Check field strength, SAR limits, and any scan-time restrictions for the exact implant. If status is absent or unclear, ask the manufacturer and radiology team before scanning. A label can still leave questions; that is worth admitting, not guessing around.

How to Choose Orthognathic Surgery Implants? — Check Regulatory Clearance, Sterility, and MRI Labeling Before Selection

Selection Area What to Verify Evidence or Decision Check Why It Matters
Regulatory status Confirm the implant is legally marketed for the intended use in the jurisdiction where surgery will take place. Check the applicable regulator’s public records and device documentation. In the United States, the relevant pathway can depend on the device and may include 510(k) clearance, De Novo authorization, or PMA approval; requirements differ by jurisdiction. Regulatory status is specific to the device, intended use, and market. Do not assume that a listing or authorization in one country applies elsewhere.
Indication and anatomy Match the implant type and instructions for use to the planned procedure, bone site, and patient anatomy. Review the labeled indications, available plate and screw configurations, and any restrictions on use. For patient-specific implants, verify that the design and manufacturing documentation correspond to the approved surgical plan. A device should be selected for its labeled purpose and fit, not solely because it is available or made from a particular material.
Sterility status Determine whether each component is supplied sterile or non-sterile and whether it is intended for single use. Follow the package label and instructions for use. If supplied non-sterile, use only the validated cleaning and sterilization method specified by the manufacturer; do not infer a cycle from another device. Sterilization requirements vary by device and can affect patient safety and implant performance.
Package integrity and expiry Check the sterile-barrier package, seal, lot or batch information, and expiration date before use. Do not use a sterile device if its packaging is damaged, open, wet, or otherwise compromised, or if it is past its labeled expiration date. Follow the device instructions for any exceptions or handling steps. A compromised sterile barrier may invalidate the sterility assurance of the packaged device.
MRI labeling Identify the exact MR status and any scanning conditions for the specific implant and configuration. Use the device labeling: MR Safe, MR Conditional, or MR Unsafe. For MR Conditional devices, confirm all stated conditions, such as field strength and other scan limits, with the current instructions for use. Do not assume that all metal implants have the same MR status. MRI safety depends on the labeled device and specified conditions; the implant’s material alone does not establish its MR status.
Material and composition Review the labeled material, coatings, and any known patient sensitivities or relevant clinical considerations. Confirm the composition in the device documentation. Orthognathic fixation products may use materials such as titanium or titanium alloys; the specific material must be verified for the selected device. Composition can affect clinical suitability, compatibility, and interpretation of device labeling.
System compatibility Confirm that plates, screws, instruments, and any patient-specific components are intended to work together. Check the manufacturer’s compatibility information and instructions for use, including specified screw types, sizes, and instrumentation. Avoid mixing components unless compatibility is documented. Incompatible components or instruments may not perform as intended.
Traceability and records Ensure the device can be identified and documented in the patient record. Record the device name or type, size, material when available, lot or batch number, and any applicable implant or patient-specific identifier, following local requirements. Accurate records support follow-up care, device identification, and applicable safety reporting.

Use the current device labeling and local regulatory requirements. Implant selection should be made by the qualified surgical team based on the patient’s clinical needs.

FAQS

What does ELI mean in Ti-6Al-4V ELI?

ELI means extra-low interstitials, including tightly controlled oxygen levels. It describes the alloy’s composition, not a guaranteed clinical result.

What strength values are reported for this alloy?

Specified product forms have minimum tensile strength of 860 MPa and yield strength of 795 MPa. Minimum elongation is 10%. These are material-test values, not healing guarantees.

Why might this alloy be chosen over commercially pure titanium?

Its higher strength can help designers create compact plates and screws for facial bones. But strength alone does not determine suitability.

Does a stronger alloy mean better healing?

No. Bone quality, screw position, plate shape, and chewing forces also matter. It is not a simple ranking.

Why check documentation for the finished implant?

Raw material records do not describe every feature of the finished device. Ask about traceability, fatigue, corrosion, and surface finish. Those details can be missed.

How can CT imaging support implant planning?

CT images show bone thickness, asymmetry, tooth roots, and nearby nerves in three dimensions. Even a few millimeters can affect fit or screw placement.

Can a CT-based plan guarantee a perfect fit?

No. Movement or metal artifacts may obscure bone edges, and image segmentation can be imperfect. Sometimes plans change during surgery.

What should the team review beyond the CT model?

The team should consider the patient’s bite, goals, medical history, and examination. They should discuss alternatives, risks, and possible effects on future imaging or revision surgery.

Conclusion

Choosing Orthognathic Surgery Implants begins with understanding their role: plates and screws stabilize the jaw bones while an osteotomy heals. A 2.0-mm fixation system is commonly used, but the appropriate configuration depends on the surgical plan and the forces expected at the site. Material is another consideration. ASTM F136 specifies Ti-6Al-4V ELI titanium alloy for implant applications, and the selected components should be suitable for their intended use.

Plate shape, thickness, and screw length should be matched to the patient’s bone anatomy, the location and type of osteotomy, and expected loading. When standard components do not fit the anatomy or plan, patient-specific implants may be evaluated using CT-based planning. Before selection, confirm applicable regulatory clearance, packaging integrity and sterility, and the device’s MRI labeling and conditions. The final choice should be made by the treating surgical team in light of the patient’s anatomy, clinical needs, and the implant’s documented specifications.

Isabella

Isabella

Isabella is a dedicated marketing professional with a sharp focus on driving brand growth and engagement through strategic content creation. With an extensive background in digital marketing, she combines her passion for storytelling with her keen understanding of industry trends to deliver......