 Bonevia
Bonevia
Bonevia
Choosing Cortical Screws is not a matter of selecting the largest diameter on the tray. The right choice depends on the bone, the fracture pattern, the planned construct, and the patient’s anatomy. A screw that looks suitable on a screen may behave differently in thin cortex or fragile bone. Small details matter: thread design, length, trajectory, and whether the screw is intended for a plate or independent fixation. Fit matters.
Orthopedic trauma surgeon Professor Michael Blauth is an established figure in trauma education. Rather than attribute an unverified quotation to him, this guide uses a clearly labeled editorial paraphrase of a core fixation principle: “Match the implant to the bone and the mechanical task.” That is not a verbatim quote from Professor Blauth. It captures a practical idea: fixation choices should follow the clinical goal and sound surgical judgment, not habit alone.
This introduction sets up the key questions behind choosing Cortical Screws: What bone quality is present? How much cortical purchase is needed? Does the planned screw length provide secure fixation without unintended penetration? The answers depend on imaging, operative findings, device instructions, and the treating clinician’s training. No single screw suits every case. Even a well-planned choice deserves a second look when anatomy or bone quality differs from expectations. That humility is part of reliable decision-making.
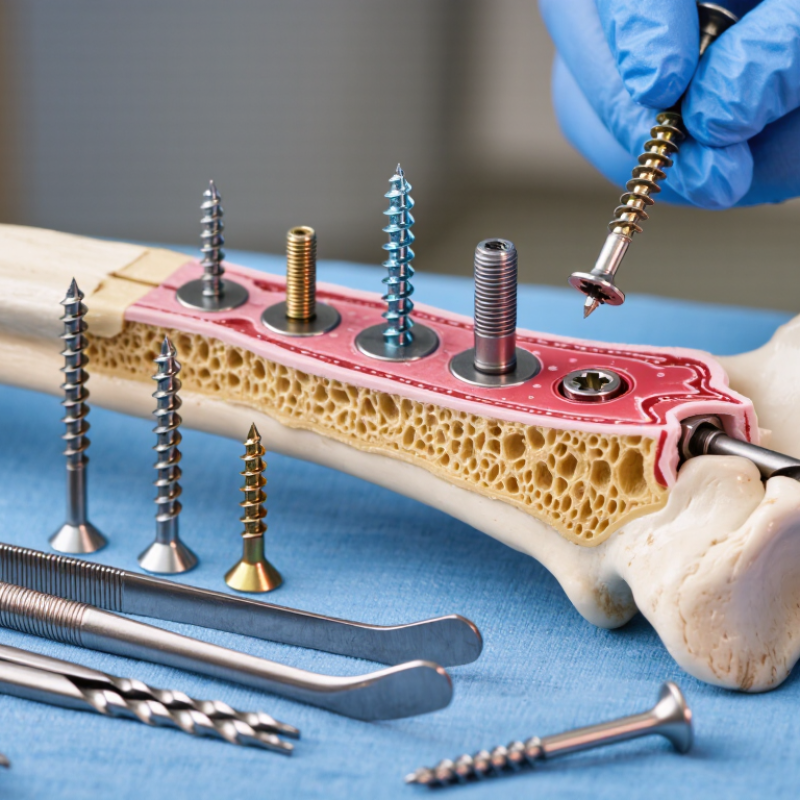
How to Choose the Right Cortical Screws?
Define the Fixation Goal and Assess Cortical-Bone Quality
The fixation goal should guide screw selection, not habit. A screw intended to resist pullout may need a different strategy from one that mainly controls rotation or compression. Name the load. Consider its direction, expected forces, and whether the construct must share load with a plate or another device. Cortical screws engage the dense outer layer of bone, but its quality varies by patient and anatomical site. Thin cortices, low bone density, prior surgery, or a fracture pattern may raise concerns about purchase. Imaging offers clues, not certainty.
Screw diameter, length, thread design, and trajectory should suit the anatomy and fixation demands. Measure carefully. A screw that is too short may miss useful cortex; one that is too long may irritate nearby structures. When bone is weak, choosing a larger screw is not automatically safer. It may split fragile cortex or complicate placement. The plan may need adjustment to reflect operative findings and the full construct. Paper measurements cannot capture every detail. Discuss risks, alternatives, and healing expectations with the treating orthopedic team, since individual anatomy and diagnosis affect the decision.
| Fixation goal | Bone-quality assessment | Cortical-screw considerations | Planning and checks |
|---|---|---|---|
| Provide plate-to-bone fixation | Review available imaging for cortical thickness, bone defects, and the location of the intended screw path. Consider patient history and signs of reduced bone density. | A conventional cortical screw can generate compression between a plate and bone when used with an appropriate plate hole and technique. A locking screw, when used with a compatible locking plate, forms a fixed-angle connection rather than relying on plate-to-bone compression. | Choose the screw and plate combination specified for the construct. Confirm the planned trajectory, screw length, and that the screw head is properly seated. |
| Compress a fracture or osteotomy | Assess whether the intended near- and far-side cortices appear intact enough to support the planned purchase. A fracture line or cortical defect may alter screw hold and compression. | Lag-screw compression depends on the selected technique, fracture geometry, and screw path. The near cortex may require a clearance hole so the screw can draw the far fragment toward it; this is distinct from simply inserting a fully threaded screw across the fracture. | Plan the trajectory to achieve the intended fragment engagement while avoiding joints, neurovascular structures, and other critical anatomy. Confirm reduction and screw position with appropriate imaging. |
| Secure fixation in thin or fragile cortex | Look for thin cortices, low bone density, prior screw holes, and local bone loss. Imaging and clinical context provide complementary information; neither alone precisely measures local screw-holding strength. | Reduced cortical purchase can increase the risk of loosening or pullout. Screw diameter, length, number, and distribution should be selected for the anatomy and construct; simply increasing screw size may risk splitting or damaging limited bone. | Consider whether the overall construct needs a different fixation strategy or additional support. Follow the implant system’s instructions and avoid excessive insertion torque. |
| Obtain bicortical purchase | Identify the far cortex and nearby structures along the entire planned path. Bone quality at both cortices may affect purchase. | Engaging both cortices can be useful in selected constructs, but bicortical placement is not appropriate in every location. Screw length and trajectory must be matched to the bone and anatomy. | Measure depth using the applicable technique and verify the tip position. Avoid unintended prominence or injury to structures beyond the far cortex. |
| Maintain fixation near a joint or narrow bone segment | Use imaging to define the available bone corridor, cortical boundaries, and proximity to the joint surface. | A shorter or differently directed screw may be needed to remain within the safe bone corridor. The appropriate diameter and length depend on the implant system and patient anatomy. | Check screw position in suitable imaging views and ensure the screw does not penetrate the joint or compromise adjacent structures. |
| Choose between conventional and locking fixation | Consider cortical quality together with fracture pattern, plate position, and the intended load-sharing or fixed-angle behavior of the construct. | Conventional screws rely on thread purchase in bone and can draw a plate toward bone. Locking screws engage a compatible plate thread to create a fixed-angle construct; they do not automatically improve fixation in every clinical situation. | Do not mix components unless compatibility is explicitly established. Follow the system-specific surgical technique and confirm the intended screw-plate engagement. |
General educational information only. Screw selection, dimensions, trajectory, and fixation strategy should be determined by a qualified clinician based on the patient’s anatomy, imaging, procedure, and the implant manufacturer’s instructions for use.
Match the diameter to compatible plate holes, drills, and instruments. Consider anatomy, fracture pattern, bone quality, and the planned construct. Larger is not automatically stronger.
No. Their screws, plate holes, drill sizes, and instruments may differ. A mismatch can prevent proper seating or affect the planned fixation. Check the system specifications.
Common specifications pair 3.5-mm screws with a 1.25-mm pitch and 4.5-mm screws with a 1.75-mm pitch. Pitch is the distance between neighboring thread crests.
Not by itself. Core diameter, thread depth, hole preparation, and cortical thickness also affect screw purchase. Small difference, not simple.
Use the appropriate depth gauge and follow the instrument instructions. Account for plate thickness and the intended screw path. Recheck if the plate shifts or the drilling angle changes.
A short screw may provide inadequate engagement. A long screw may extend beyond the far cortex and affect nearby tissue. Measurements can be imperfect.
Not automatically. Confirm the screw head, diameter, thread type, and plate-hole compatibility. A visual match is not enough.
Confirm that the components are approved for use together, including their alloy and surface specifications. Unverified combinations may raise concerns about corrosion or construct performance. When uncertain, check the device documentation or consult a qualified surgical professional.
Choosing the right Cortical Screws starts with defining the fixation goal and assessing cortical-bone quality. These factors help determine the required screw diameter and guide selection between common 3.5-mm and 4.5-mm systems. The screw’s thread pitch should match its diameter: a standard pitch of 1.25 mm is used with 3.5-mm screws, while 4.5-mm screws commonly have a 1.75-mm pitch. Matching these specifications supports appropriate engagement with the intended bone and fixation system.
Select the pilot drill according to screw size: 2.5 mm for a 3.5-mm screw and 3.2 mm for a 4.5-mm screw. Before insertion, measure the required screw length carefully and confirm that the screw is compatible with the selected plate and materials. Considering these details together helps ensure that the components suit the planned fixation and that the screw is neither too short nor unnecessarily long. When bone quality or the fixation plan is uncertain, seek guidance from a qualified clinician.
